Wednesday, January 7, 2015

Carving a 17th Century Tailpiece

This project was done on commission for an instrument collector who was very interested in recreating a violin currently housed in the Bachhaus in Germany, the violin itself will be the subject of another post.  (This particular violin has a natural trumpet built into it.)  We know from the instrument's documentation the year it was built and that it has been with the collection since the 18th century.  The critical measurements provided by the museum accompanied the rather poor photographs I had to work with.  But having the measurements allowed me to transfer the photos into drawings with rather decent precision.


The photos were small and every attempt to blow them up reduced their quality so i was forced to use blurry photos for the measurements. Although that did not create any real problems it certainly was not easy.

From the basic measurements of the body the tailpiece dimensions were easily determined after scaling up the photos. The curves of the sides of the tailpiece I traced from an older English (?) style tailpiece.  The tailpiece seen in the right of the photo which I was hoping to copy directly turned out not to have any measurements that matched the scaled drawings.


I did have two photos that showed the tailpiece from the endpin view.  That angle provided important information about its thickness and general curves.


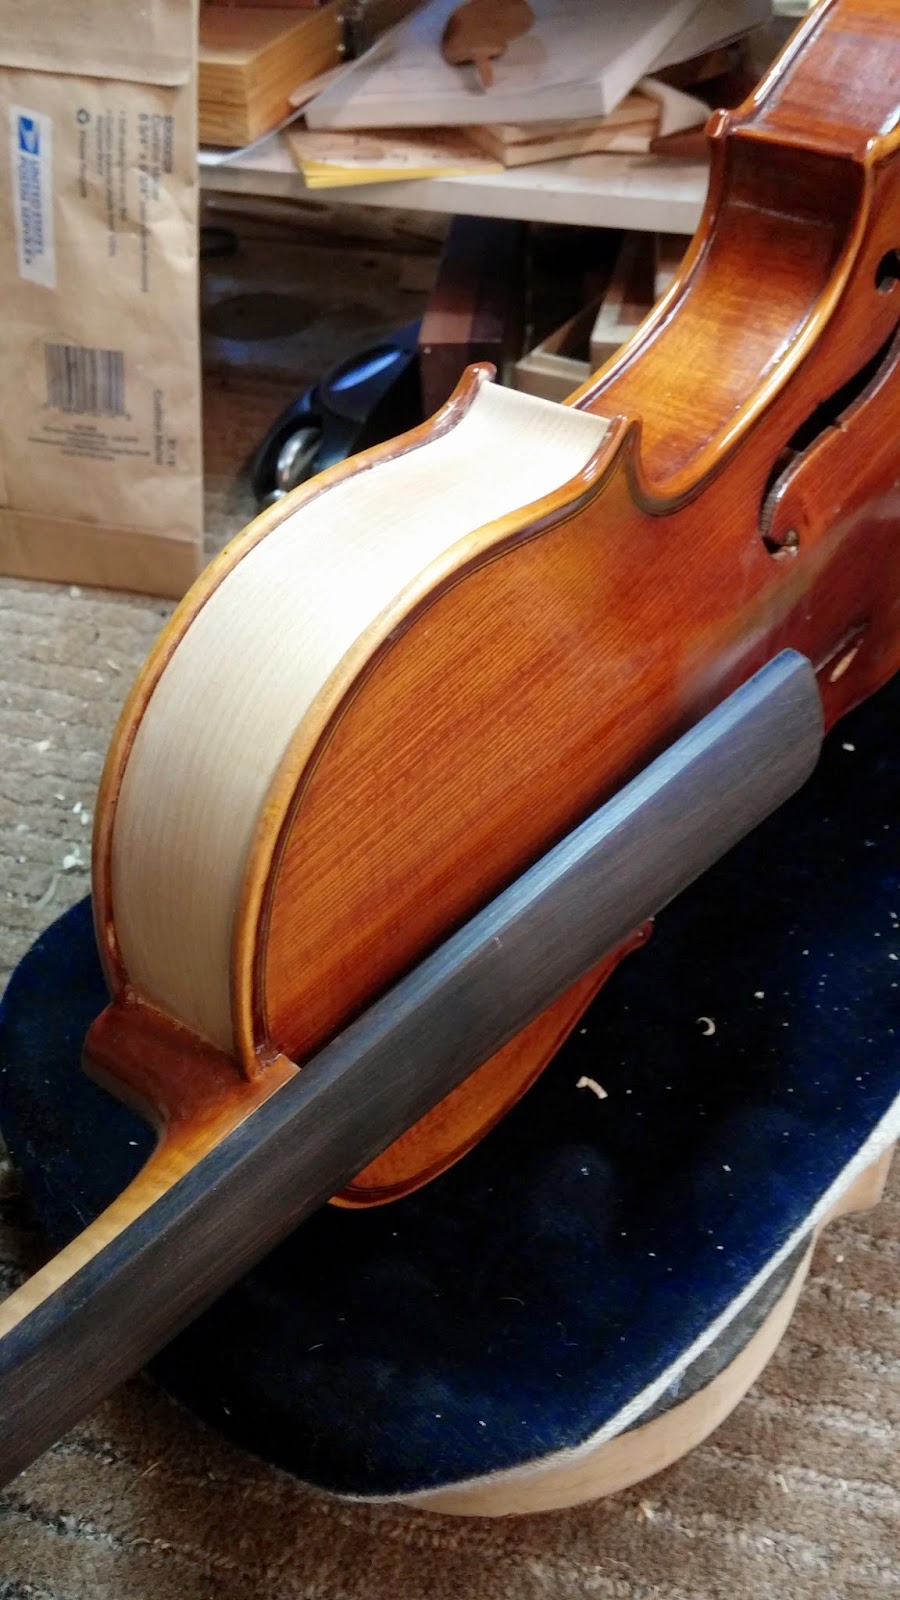
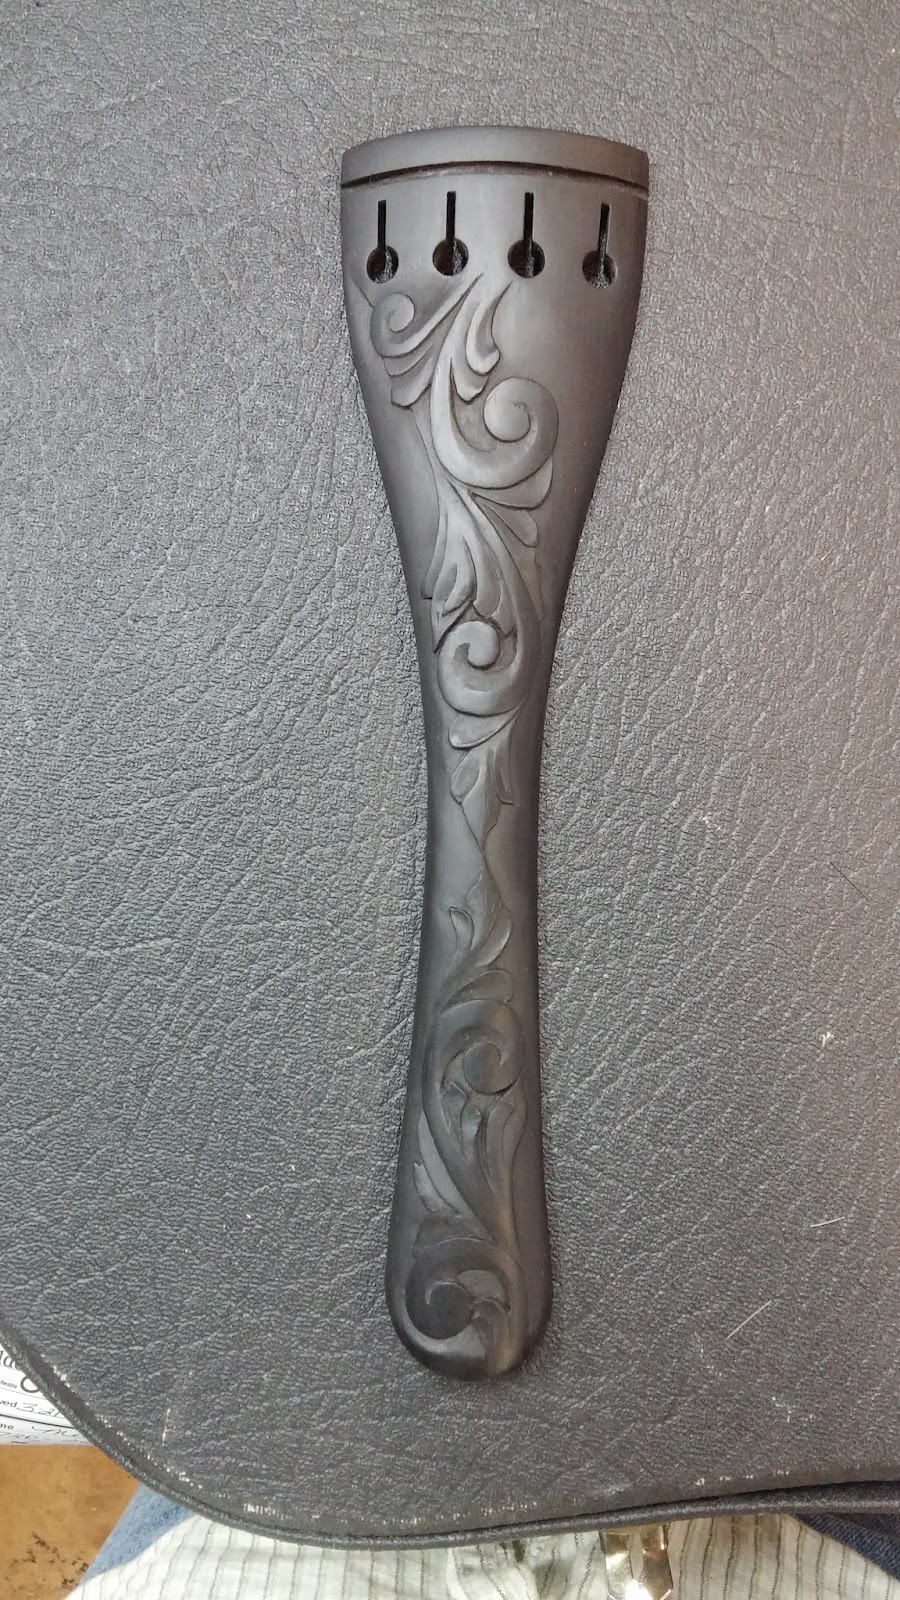
The photo above shows the tailpiece after initial shaping and drilling.  I cut the piece a bit wide so as to be able to change the shape slightly from the original if needed. I wouldn't know if my measurements were correct until the shaping began.  I was worried that the perspective might be skewed so I was ready to rely on my eye for the final shaping if something didn't look correct as I cut it to the final shape (I have only one photo that shows the tailpiece perfectly straight on and unfortunately it is also the worst photo I have of the instrument.


I did the initial radiusing with a Foredom rotary tool.  I used a medium grit carbide burr.  All shaping after that was done by hand using sandpaper and files.


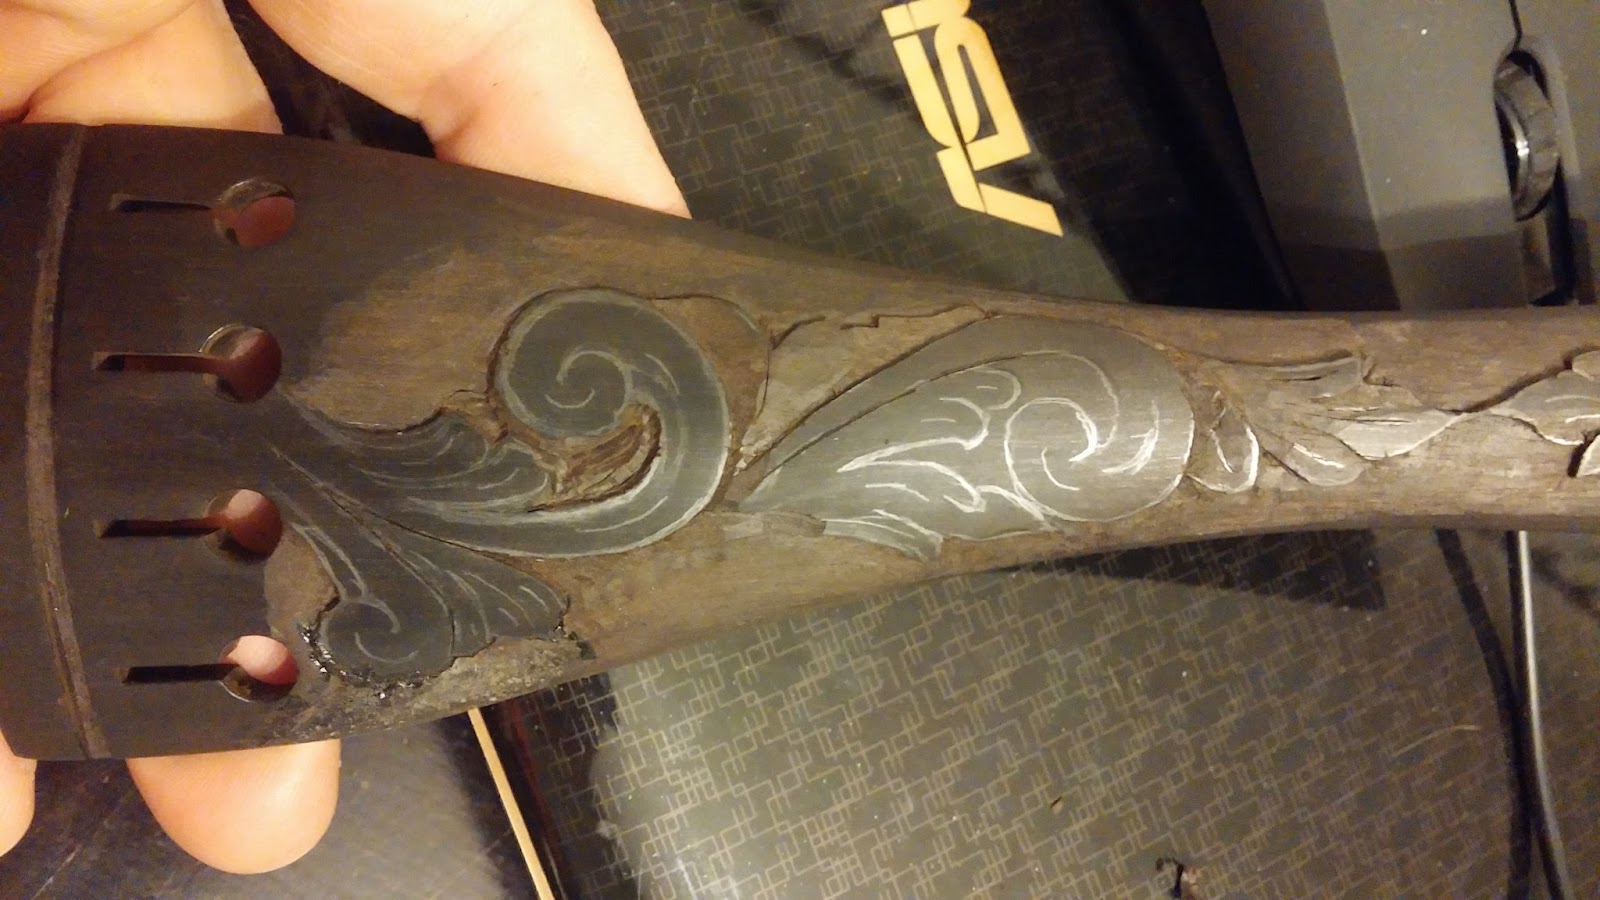
This is the tailpiece ready for the inlay work to begin.  The radius was going to create some problems with the ivory or bone inlay. I had to cut the inlay pieces extra thick to compensate for the curves.  I worked with both bone and ivory for the inlay and the ivory simply looked, and matched the photos, better.  (A serious footnote: the ivory was a scrap just large enough for those two inlays, as you can see in the photo below, and was probably 50 years old, my guess was it was cut from an old gun grip. I would not normally work with ivory and am against its use, sale, and trade of any kind in the marketplace. I made an exception for this as it was honestly an old broken scrap.)


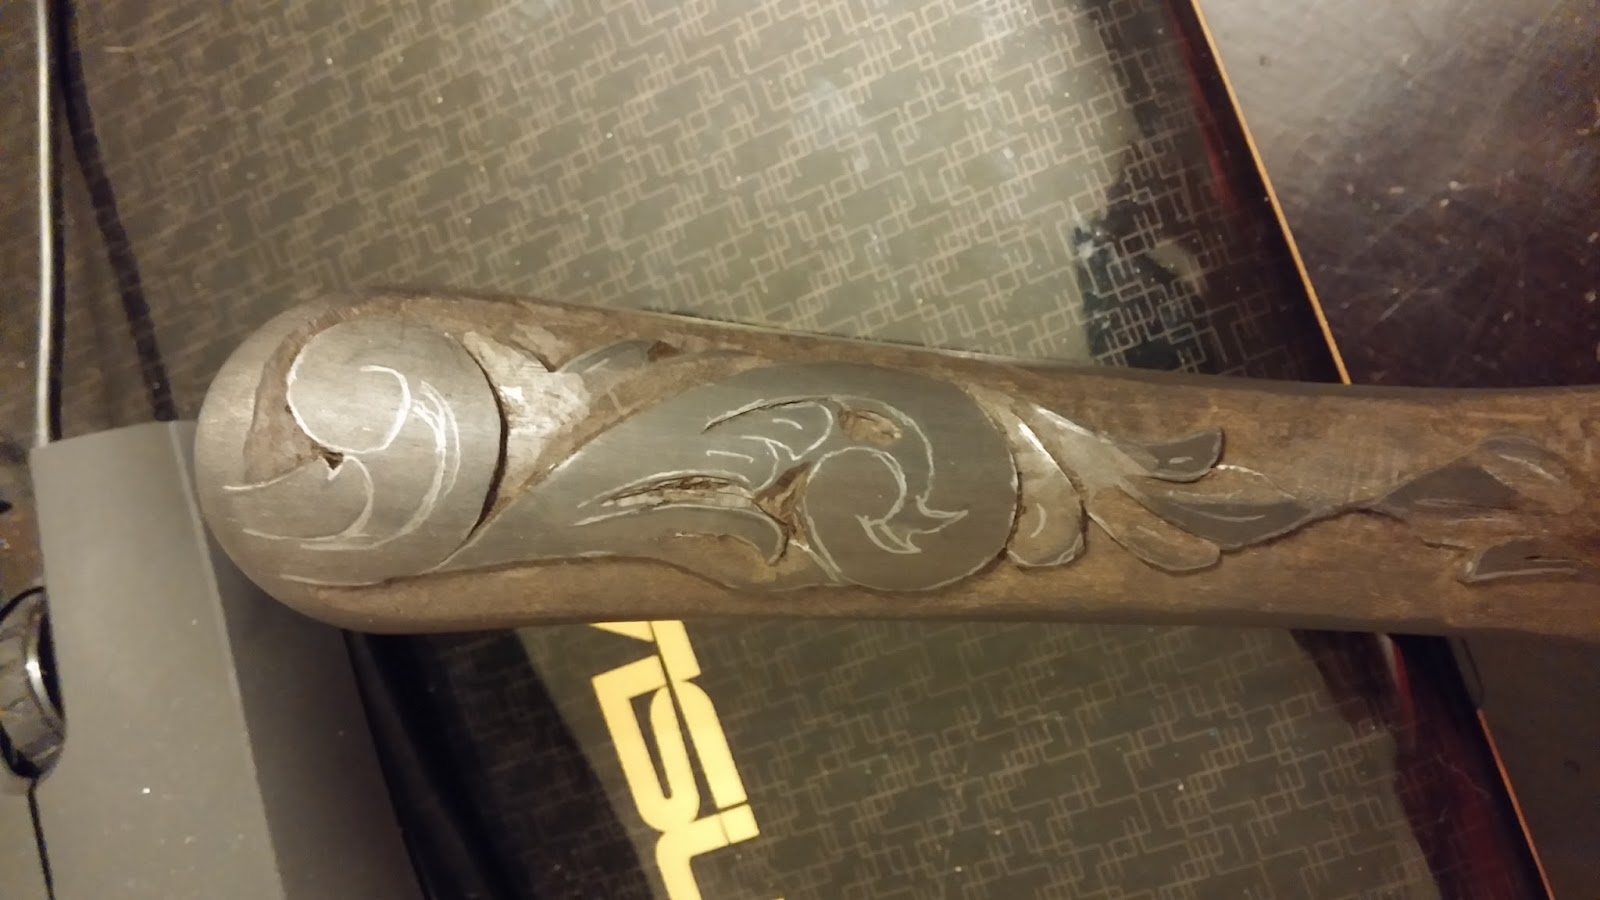
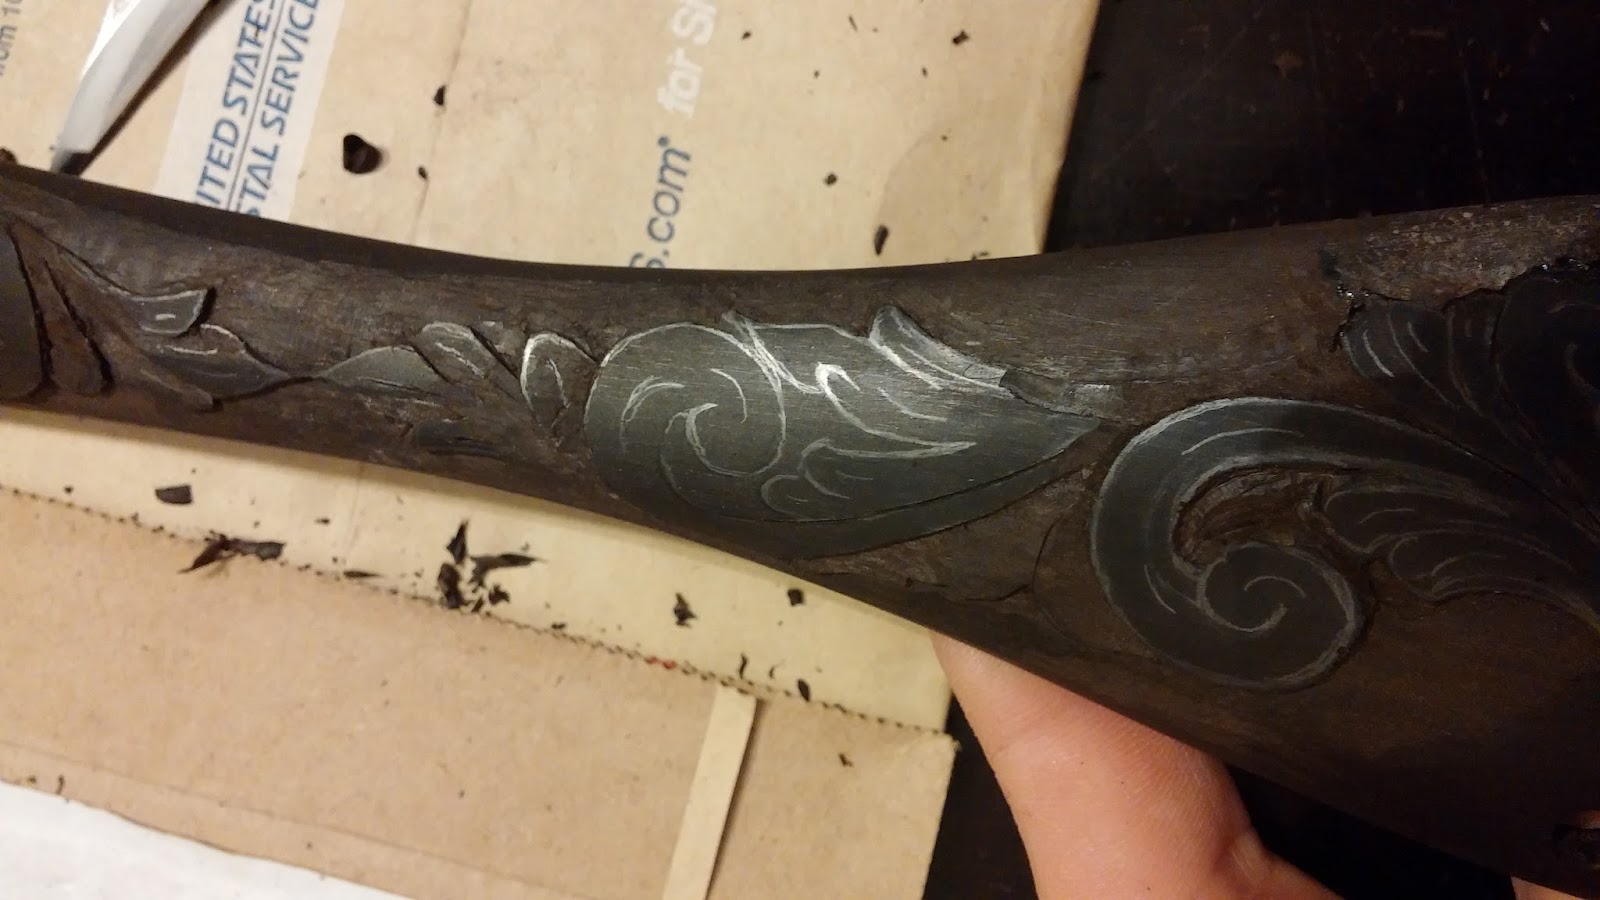
The inlays were cut using a jeweler's saw with an extremely fine blade. After cutting, the inlays were glued temporarily to the surface, carefully traced with a fine tanto pointed knife, and then removed with a painter's spatula. I cut the cavity using both a Dremel tool at 25,000 rpm and a .5mm burr, and a series of knives to make the edges absolutely crisp. The inlays were a perfect fit. After gluing and light sanding using papers starting at 400 grit and working up to 1000 grit, I oiled and french polished the entire surface.


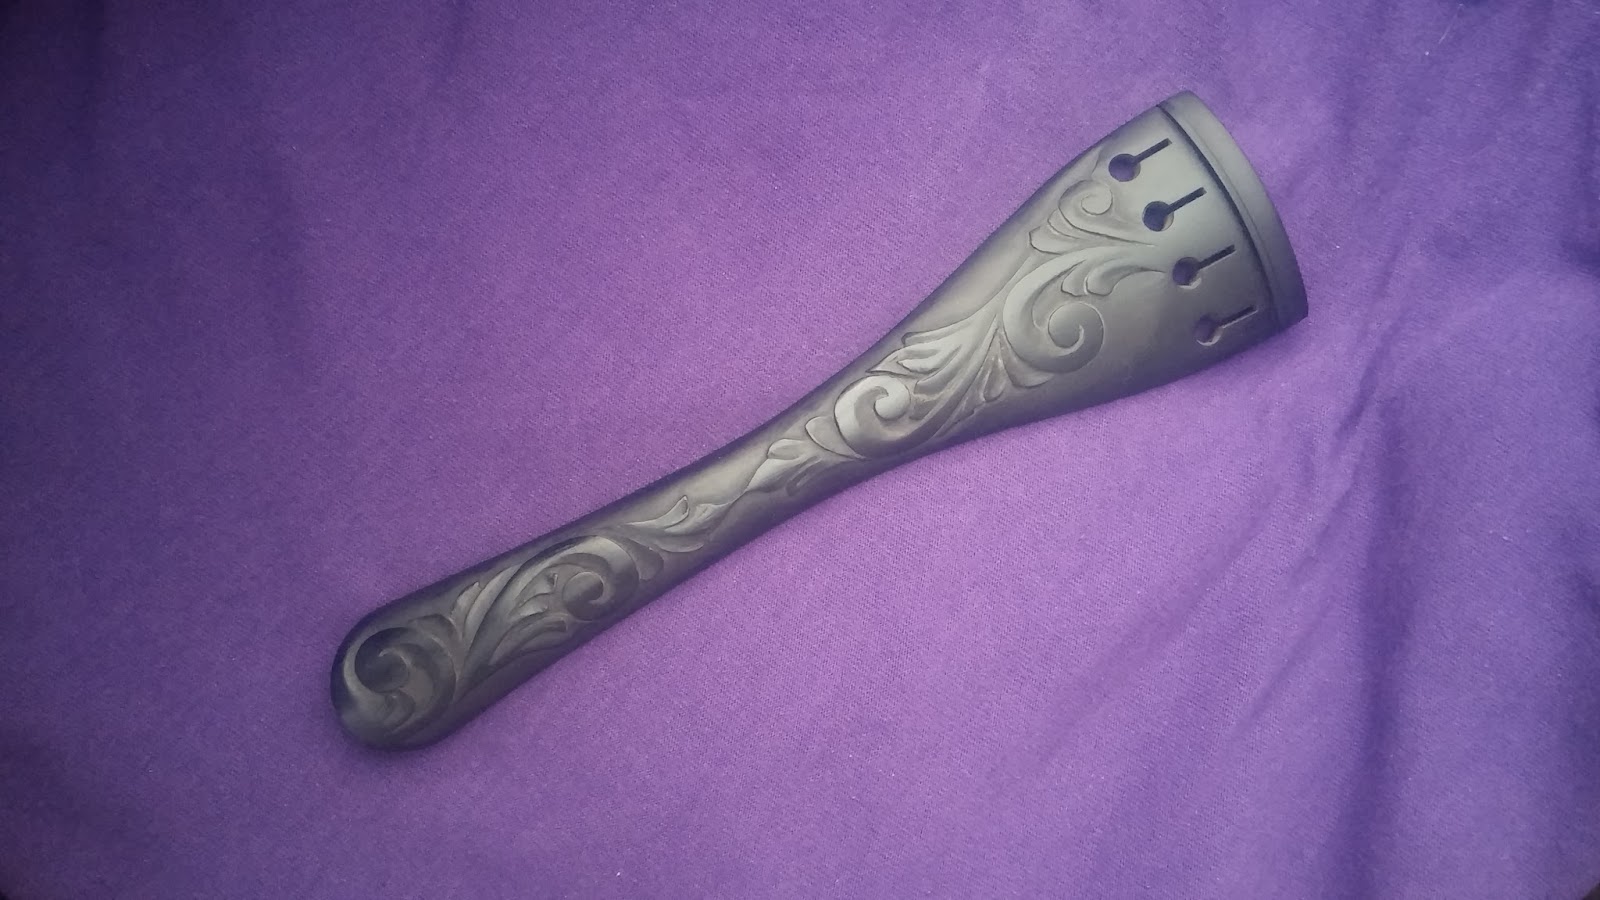
The above photo is the finished piece as delivered to the customer. It will be installed on the reproduction violin upon completion of that project.  Thank you for reading, John Orth
Orthwest Studios

Friday, January 2, 2015

Custom Carving a Cello Tailpiece

Custom Carving a Cello Tailpiece
By John Orth

This tailpiece was carved as a display piece for my shop.  The tailpiece itself was factory made, probably fairly old, and was taken off of an old cello that had come in for restoration.  This particular one is a beautiful piece of ebony and that is why I chose it.  When doing work like this it helps to have very straight grain and uniformity of color.  

The process starts with the drawing of the design.  In this case I wanted Victorian scroll work to really highlight the shape, but not so much carving as to be awkward looking on the instrument once installed.

CAM00389.jpgMechanical pencils work well for this.  The small, detailed 0.5 tip make for easy carving later on.

The initial carving begins with outlining using either a knife or skew chisel.  Some might prefer to use a veining chisel or something similar, but i am very comfortable using a marking knife or even my violin bridge knife for the defining edges.
CAM00444.jpg

The relief will be shallow in the finished carving.  No point in the carving will be deeper or taller than one millimeter.

CAM00443.jpg

The photos both show the initial outlining and some minor reference depth cutting.

CAM00441.jpg
More of the background can be removed with a foredom or dremel style tool.  Rotary tools are really helpful for the quick removal of waste material.  Be very careful with rotary tools around the detail, one slip and you’ll find yourself doing repair work.  You can see an example of that in the uppermost leaf of the scroll almost where it touches the string hole.  With ebony, the simplest solution is a combination of superglue and ebony dust.  On larger repairs it is better to pare the area flat and replace it with a new piece of solid wood.  

CAM00442.jpg
All of the initial lines have been cut and the shaping has begun.  I work mostly with a gouge and a ¼” paring chisel. As you get deeper into the detail smaller tools like dental scrapers work better.

CAM00447.jpg

Here you can see where some of the detail is beginning to show and most of the bulk removal has been finished.  It is relatively easy to make sanding blocks and scrapers from bits of metal and cut scraps of wood with sandpaper glued to them.  The amount of detail is up to you and really depends on the overall look you are going for.

CAM00448.jpg
A good cup of coffee will get you through the long hours of carving… Here you can see the details, the few I want, drawn back in with a pencil.  I find it helpful to continually redraw the image, both to follow my original design, but also to make changes where necessary.  Often, the design will change because as you cut into the piece the depth changes the overall look and perspective changes with it. So do not be afraid to let the piece flow… as long as you are still in control.

CAM00452.jpg

Getting closer to the final shape before polishing begins.

In the next photo the shapes I was looking for is finished and the sanding and polishing are underway.  This part requires as much patience as you are willing to put in to it.  Take your time.  Projects like this can take weeks of part time work, so there is no rush.  
CAM00542.jpg

20150102_125247.jpg
Here you can see the upper leaf is finished while the lower still requires some finishing.  Keep in mind that these parts are only raised less than 1mm from the surrounding surface.

And the finished carving.
20150102_125636.jpg

After the carving is complete to your liking any number of finishes would work. For this piece I am using a very simple French polish, a combination of shellac, rosin, linseed oil and rottenstone. The new string saddle was cut from a scrap of ebony, an old fingerboard.  

Thanks for looking.  And if this post inspires you in any way to carve a piece of your own please share the images with me.  Thank you, John


Thursday, January 1, 2015

Color Matching Violin Varnish, introduction

By John Orth
In this first part I'll begin with an overview of
color matching principles for violins.  There are many available techniques, and over time perhaps I can cover a few of them.  I have developed a few techniques that I would consider my favorites.  What works for me may not work for others, but by studying many possible techniques you will find one or two that work for you. 

Here are a few questions to ask yourself before you begin:

The most important question you can ask:
What is the value of the instrument and how will any varnish repair affect that value?
     The answer to that question is always subjective and requires experience.  Know the instrument you are about to work on and do not enter into varnish work lightly because the consequences are usually permanent.  (These articles will focus on touch up and matching, not refinishing.  The complete refinishing of a violin has many consequences, not just monetary value of the instrument, to consider and will be explored separately.)  

Is the area to be color matched separate from other colors? as in a newly installed rib?


Or a newly installed neck?


Or do the colors have to blend together on a single surface as in the damaged top shown below? 

These might seem like obvious questions, but it helps put you in the right frame of mind.  Asking yourself obvious questions will give you pause to explore options.  In each of these examples multiple techniques could be employed.  Which technique would best suit the job at hand? Experience and practice will provide the answer.

In future installments we'll explore three important techniques in detail that cover all the images shown above: brushing, pointillist brushing, and airbrushing.  Airbrushing is the most basic in that the techniques are simple to learn, take little time explore, and offers any luthier great flexibility with fading and color blending over large surface areas like the violin rib shown above. The airbrush allows a degree of fading and blending that other techniques just don't offer.  I typically use the airbrush on lower end instruments or to apply a final clear coat when time is a factor. 

Brushing, or padding, requires patience, practice, and a steady hand to accomplish with any degree of skill on a valuable violin, but can often be employed with relatively positive results by a beginner if the pre-made varnish is well matched to the instrument as with the heel and scroll shown above.  With the violin neck shown in the photos above I pre-matched the varnish and applied it to many scraps of wood until I was happy with the results.  Then, using a combination of brushes and french polishing techniques, the final product is a well blended and effortless looking finish that matched the original.

Pointillist is my preferred technique on high end violins or anywhere the colors are complex as in the photo below.  Pointillism is usually the most time consuming and most difficult to master, but will provide you some amazing results if your patience can withstand the monotony.  The violin shown below was done with many hand carved toothpicks and extremely tiny brushes using pointillist techniques (this violin will be the focus of the post on this particular technique).  Each bit of color is applied in extremely tiny dots, using sharpened toothpicks and then very slowly blended together using brushes, often handmade, of various shapes.  The color application can take many hours over as many weeks. You can easily plan on one hour per inch.  (The lighting on the violin was not very good when I took these photos, but if you look closely at the photos you will see that this technique allows you to completely control the color application and maintain the original look of the varnish with all the variation in blending and fading that was in the original varnish.)  


With any of these techniques there is a certain amount of learn craft, or simple technical skill that one must employ, but the rest is art.  Color matching is where the luthier is allowed to explore and create, dream and hope... and sometimes with a bit of guessing, resurrect something beautiful.  Varnish repair can be a simple craft when carried out by an amateur, or the highest art when performed by a luthier who loves his work.  Matching becomes art with each application of color regardless of how it is applied and the luthier must decide beforehand what the final product will be.  

Once you decide on an appropriate method you must ask yourself: Will I being true to the original? or, Am I creating something new? This is the last question you need to ask, because the answer determines the instrument's future.   

Thank you for reading, John

Wednesday, December 31, 2014

Cello Rib Replacement

By John Orth

This post is a follow up to the last post about the violin rib replacement.  This particular cello was also student model, but a rather high end student model, factory made with excellent wood and nice hand work.  An instrument definitely worth repairing.  Here, as in the last post, I need to make clear that changes like these are permanent, and need to be considered carefully.  But as you will see the finished product returned the cello to basically new condition with no sign of the repair... this is where something like a carfax report for a cello would be handy for any future owner.

This cello came in for a repair very similar to the violin I wrote about here.  The damage is untouched and was photographed as I received it. The owner put his foot through it when it was incorrectly placed on the floor.  This particular instrument, being of rather nice quality, meant I was going to spend more time selecting appropriate wood and finishing options. Hopefully this will give you some ideas as to what can be accomplished when you learn the necessary skills and take your time.  


The rib was completely broken through and cracked to the end block.

The repair began in a similar process of scoring, paring, and cleaving the broken rib from the linings.  Again, it is extremely important in a process like this that you take your time.  Be very careful not to loosen the linings from the plates and make every attempt to avoid undue pressure on the top plate.  The spruce is fragile, especially when working along a long edge like the lower bout of a cello. I mainly used a paring chisel working through the rib. as you'll see in the photos the splinters are small.  Do not attempt to remove the rib in one shot.  Slowly remove the pieces, cutting and slicing as you go.  Prying on the rib to remove any part of it will loosen the linings.  


This cello was very well made and had excellent linings and great hand work, so removal was fairly straightforward.  The linings were cleaned with a scraper.  

The rib was replaced in the same manner as the replacement violin rib, with one major exception you'll notice in the photos.  The grain matches nearly perfectly with the other rib material.  When dealing with high end instruments this is extremely important.  I included multiple photos of the color matched and polished piece. The finished varnish matched nearly perfectly with the original.


 Thank you for reading, John
Orthwest Studios


Violin rib replacement

By John Orth

Replacing a rib completely is something you should not go into lightly.  A luthier must also as himself, “is what I’m doing permanent?  Or better yet, “are the changes I’m about to make reversible?  In this case no. This is extremely important when dealing with any valuable instrument, and why I must take into consideration the particular instrument first. In this particular post we will be looking at the rib replacement on an intermediate grade student violin, so there is no harm being done to the value, and if the repair is done correctly with regards to proper violin repair techniques you would even little impact the value of a higher grade violin. But please, this technique is not one of the simpler ones I’ll be talking about. So unless you have the necessary hand skills, please refer to this as reference only.  


The violin came to me with a large hole in the rib after being dropped. Completely and perfectly punched through. none of the original wood remained. In this particular case the rib damage was exactly in the center of the rib. I'll post an addition blog about a similar cello repair so you can see the similarities and differences. The linings were not impacted and neither were the top and back plates. Removal of the damaged rib in this case was simple, but slow going. Using a plate removal knife, or even a bridge knife, score the seams along the top and and back plates. Be extremely careful at the corner where the damaged rib meets the center bout, that's an extremely difficult repair to do properly. Try not to loosen the plates from the rib. we want to retain every bit of stability in the violin's structure as we can during the procedure. Next, with a freshly sharpened chisel begin to remove the rib from the surface of the rib down to the linings. Take your time. slowly slice away at the rib until all material is removed without having touched the linings in any way. if done correctly the linings will still be completely intact and connected to the plates. Reconnecting the linings if you loosen them is not a fun thing to do. Trying to get them lined up properly where they were originally is difficult at best.


The linings still perfectly intact and scraped clean of most of the remaining glue. The linings on factory instruments are rarely perfect, don't expect them to be. They are usually shoddy pieces of scrap wood haphazardly glued in.  These were not bad, the lower was better, and the corner block was solid and well cut.

The new rib was sliced from a quartersawn block of maple and thicknessed to 1.2mm after sanding, roughly matching what was there (I say roughly because factory made violins are not perfect and rib thicknesses often vary quite a bit, so after measuring I chose a happy middle ground. And the thickness of 1.2 is a nice place to be anyway on a full size violin. ) I used a bending iron to fit the rib with no pressure applied.  The rib seen in this photo is simply sitting there; it is not glued in.  I am stressing this point.  You want the new rib to have the perfect curve.  you do not want the new rib applying pressure in any direction.  In other words, it should fit perfectly where the old one was.  After that, gluing is a simple operation with edge clamps.  Leave the extra length and cut that to fit after the glue has cured.  You want the upper bout rib to overlap the center bout rib completely, as it was originally.  (Knowledge of basic violin construction principles would be handy to understand it placement.)


The photo below shows the new rib cut to fit after the glue has dried.

The next steps are basic color matching, finishing and polishing.  I will cover these topics in future installments.

This is the violin after the first color coat. There are a few steps missing here, but they require there own segments to explain properly.  You don't always get it right on the first coat, but in this case the color match was nearly perfect.  It is missing some of the bright yellow of original undercoat, and the maple I chose does not have exactly the same curly figure of the original, so I focused my energies on the color itself to hide the repair. (On a much more expensive instrument you should absolutely spend more time grain and pattern matching the wood.  I'll post an example of that in my next, and related post.) After the final clear coat it was buffed and polished using a combination of pumice and oil.  

The final product made its owner very happy.

In conclusion, this repair is a complicated one, but one that can be done well if care is taken at each step to ensure accuracy.  This repair took four days with the total working time at near 3 hours.  If you have never attempted a repair such as this expect to spend a solid 8 hours over one week to do the work cleanly and properly.  Your patience will be well worth the results.  

Hope you enjoyed the post.  Thank you for reading, John


Notebooks from the Bench

I have been working at or around a luthier's bench for most of my life.  These postings will be a virtual copy of my bench notebooks, currently numbering in the hundreds of pages.  I will attempt to post each week as I get my notes typed.  I will be covering many topics from simple instrument repair to extensive reconstruction techniques on mandolins, violins, guitars, etc.  Feel free to post or email questions.  I will be happy to answer them or put you in touch with someone who can. Thank you, John